Showing posts with label handmade. Show all posts

GELLI PRINT ART TAGS with Phyllis Terrell

Gelli Printed Art Tags By Phyllis Terrell


One of the great things about teaching online and having an online presence through this blog, Facebook and other sites, is the opportunity to connect with like-minded souls.  I so enjoy that!!

Case in point, my recent online workshop "Gelli Jam" with Artful Gathering Online Art Retreat in the summer of 2014.  I met such wonderful people through this event, including the lovely Phyllis Terrell.  One of the projects Phyllis and the other students took part in was making a mini art journal with gelli printed shipping tags.  

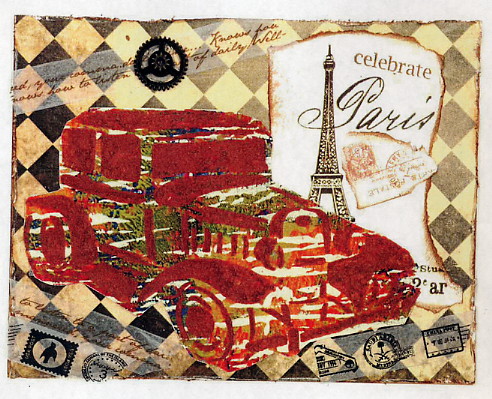
The image above is a scan of just a handful of the tags that Phyllis so generously sent to me for me to use in my own mixed media art.

Below are a couple examples of what I did with Phyllis' tags.  You all know how I love to create little characters with bits of pieces of this and that.  This practice of creating little "people" lends itself well to tag art.  It's also an opportunity for me to use up other scrap bits and recycled elements including those funky fibers that adorn the tags.

The very last tag uses some recycled scrapbooking stickers that someone was going to throw out.  They are metallic silver and really pop against Phyllis' awesome tag.  I'm going to send her this one as a thank you for her generous gift.

Hope you are having an awesome, artful day, my friends.

Cheers!
Joanna


Collaborative Art With Belinda Dworak - Part 2


Last week I shared with you a piece that my art friend Belinda Dworak started and that I finished.  This week we'll do the reverse.

I started this piece a very long time ago.  The substrate was a piece of scrap matboard about 8X10.  I did some different mixed media techniques on it in paint and spray inks, along with some collaged elements in the background (vintage text and scraps of paper).  Then, I covered it with some sheer ribbon that was about four inches wide and which had a beautiful metallic swirl pattern on it.  I used Mod Podge to adhere the ribbon to the substrate and then painted some glitter glue over the surface for a bit more sparkle.

The angel is an ornament I made from a recycled Christmas card.  If you check my blog posts from the end of 2013 (around December 27 or so), you'll see I posted a tutorial on how to make these ornaments.  It's hard to see in the photo, but it is 3D and the arms are folded a bit forward.  Her head is made from a flattened bottle cap, stamped face image and a circle of resin.  Ribbon and sparkly embellishments finish off the angel and she was glued to the substate with white glue.  And then this piece sat for many months until I finally exchanged it with Belinda.

Here are Belinda's notes and photos about what she did with this piece when she got it:

Belinda:  I first attached Joanna's art work to a canvas board using Golden Heavy Gel Matte Medium to help keep her piece from curling.  I use a lot of liquid paint and water when I work on my own art and it can cause the edges to roll or curl.  By attaching her piece to a canvas board, it stabilizes the piece.

Belinda:  Next I added some Golden Matte Medium.  I then started adding a tree using Liquitex brown for the trunk and a mix of greens and off-white for the tree top.


Belinda:  I then added more outline around the tree trunk and more greens to the top of the tree.  I wanted to make the angel's wings pop, so I mixed together some neon greens with white acrylic and some paint that has a bit of shine to it.  I really liked the color once I applied it around the wings.  I then mixed some golden yellows and white to paint around the bottom of the angel and canvas.


Belinda:  At this point in my process I am continuing to fill in and paint the elements I have already created.


Belinda:  I stopped at this point and left the painting sit overnight to dry and to think about what I was going to do next.


Belinda:  I decided to put an inspirational balloon of sorts above the angel.  I used my own art sheets to tear strips from and then proceeded to stamp words on each strip.  I layered the strips above the angel's head with Golden Matte Medium.  Not knowing if this was going to work, I just continued on.  Once all the word strips were down, I filled in the balloon with tiny plain strips from the same art sheet.  I then went back and painted where there were no strips to form my balloon.  I used a white signo pen to go around the strips to shape my balloon.


Belinda:  You will see in the finished painting that I used some vintage linen thread to attach to the bottom of the balloon and wrap around the angel's hand.  I also added some blue at the top to create a little sky effect and reshape the tree top.  The tree trunk or base was a little too dark for me.  I added some stamped words with white ink to lighten it up.  I carried the stamping to some other parts of the canvas too.  This is the final finished canvas.


I think Belinda did a tremendous job finishing off this piece of art, don't you?  It has been so much fun to work with her on these projects and finally see some half-finished works complete.  Stay tuned for the coming weeks as we each have one more piece of the other's art to finish off and I'll be posting about both of them soon.

Have a great week, my friends!

Cheers!
Joanna


COLLABORATIVE ART WITH BELINDA DWORAK - Part 1


Hi everyone;

Here's another fun collaborative project I was involved in, this time with the lovely Belinda Dworak.

Belinda sent me a small piece she had started on canvasboard.  It's 6" X 8."  Here's what it looked like when it arrived.  She'd used some beautiful butterfly images on sheet music to start the piece.


My first step was to take some pink acrylic paint and do some mark making on the piece, using the edge of an old credit card.  I love this effect!


Next, I added some neon yellow acrylic paint with a sea sponge, some neon green paint using a rubber stamp sheet (crackle pattern), followed by some neon pink with the sea sponge again.


After that, I used some cheap, Dollar Store number stamps with purple acrylic paint and a bit of doodling around each number.  On the right lower side of the piece, I collaged a bit of a border (Teesha Moore image), along with one of my gelli print images (the flower face) in the upper right.


Next, I added another of Teesha's collage elements (pink flower in lower right) and did some doodling around my gelli flower face.  I made the central image from assorted bits and pieces (gelli print scraps, recycled office supplies and some collage elements I had scanned from previous art I had made).  Then more doodly outlining.


My next step was to collage on to the piece the upside down number border at the top of the piece.  I also added the joker image (a scan from a playing card that I aged with a bit of walnut ink) and the alphabet text in the lower right.


I added another of my gelli print flower faces to the left side of the piece, over another collage element courtesy of Teesha Moore and more of my gelli scraps.  More doodling followed.  The pink flower in the lower right got a visitor about then too.


Next, the joker got some color added (Pitt Pen brush markers) and I did some doodling in the background of the lower left with gel pens.  I created some 3D flowers in the lower left using handmade polymer clay beads for the flowers and miniature checkerboard paper for the stems.  Our central image got a crown.  Red stamp ink around the edges of the piece give it a finished look and I called it done at this point, feeling that it had become busy enough.


I really had so much fun with this piece.  It took me a while to get going on it but once I was on a roll, it came together quite quickly.

Join me again next week when I will feature one of the pieces that Belinda transformed into something very special.

Have a great week, one and all!

Hugs!
Joanna

MIXED MEDIA ART MAGNETS - back to where it all began

Hello everyone;

Many, many moons ago (about 15 years), as some of you will know, I started on my artful adventure in mixed media by making little collages on magnets with recycled and salvaged materials.  I had been given a whole bunch of business card blanks (sturdy cardstock that measured 2" X 3.5") and decided to experiment in collage with them.  Their small size meant the process wasn't too intimidating and it was really easy to get work finished quickly.

At about the same time, I found out that you could get sticky backed magnets the exact same size and that lots of people used these magnets to turn their business cards into a marketing tool for themselves.  The light bulb went on and I still use these sticky-backed magnets to make miniature works of art to this day.

I am now, all these years later, a self-confession Gelli plate printing addict.  I use my gelli monoprints in all kinds of mixed media and collage pieces and always have interesting little bits left over, which lend themselves very well to becoming magnets.

The following are images of my most recent creations using scraps of Gelli prints along with collage elements.  I have deliberately chosen to keep the compositions simple so that the beautiful, one-of-a-kind backgrounds can shine.  You can't see it in the scans, but many of the magnets have also been treated to a little dash of glitter for a bit of sparkle.

I hope you like them.  A few are already sold but some of these are still available if you are interested.

Cheers, my friends!
Joanna


MY ONLINE ART CLASS with ARTFUL GATHERING


Hello All;

As some of you may know, I have been honored with the opportunity to teach my first online art class this summer with Artful Gathering, the PREMIERE venue for mixed media online classes.  I am so excited about this!

I will be teaching a class called "Gelli Jam" which will be all about making handmade art journals with gelatin prints and objects you have around the house.  If you're thinking of participating, you can use either a homemade gelatin plate (there are lots of recipes for these on the Internet) or a Gelli Arts (TM) Gel Printing Plate.  Either will work just fine for the projects we are going to do.

I have just finished filming my classes which will run from mid-July through the end of August on the Artful Gathering website.  You can find out more about it at:  Artful Gathering 2014

Here is a little video SNEAK PEEK at what we 'll create in the class. Hope you can join me!

Cheers!
Joanna


SNEAK PEEK VIDEO


Collaborative Art With Ginny Markley


Hello!

A while ago, the light bulb went on for me about what I could do with several of my half-finished pieces of art.  I have so many art projects on the go at any given time and sometimes they can sit around for months before I get back to them.  And while I have every confidence that at some point my muse will know exactly how I should finish off those pieces, it also feels good to get them done.

So, what was my inspiration?  I decided I would approach some of my favourite arty friends to see if they wanted to take one of my half-finished pieces and complete it with their own "take" on it.  I just knew whatever they did would be fabulous and it was very exciting to think of all the possibilities of how the pieces would end up.

One of the first to step on the bandwagon was my friend Ginny Markley and you can find her blog here.

Ginny is wonderfully talented and she and I have the same funky, quirky style in many respects.  I was very excited to work with her on this project.

Here's what I sent to her.


This started with a substrate of salvaged mat board about 7" X 9".  I covered it in recycled wallpaper for the background.  The central image is a color laser print from my collection of vintage images.  I also added several layers of different types of paint, along with some swirly bits I had cut with my Silhouette machine as practice.  Some vintage text from an old book also appears in the bottom right (behind the leaf).

And then that's as far as I got with her and where she was when Ginny received her.

Here is the finished piece after Ginny got her hands on it.


And here is what Ginny had to say about her work on the piece:

"I first used paint pens to lighten, deepen and add color.  I added lots of dots with gel pens (I love making dots ... my favorite thing to draw).  Next came the yellow line (I changed it three times before I settled on orange) to add interest because at that point everything looked pretty much the same.  Then it hit me ... I decided I had to get rid of the "Princess Leia" buns.  I first thought that I would just add flowers to surround her head but while looking for the flowers, I found a magazine clipping of a Mardi Gras mask which was the perfect size.  Now what are the chances of finding a mask that was the perfect size, perfect color and perfect style?  I think that your muse was talking to my muse.  LOL!  Anyway, I decided that I had to go for it and use the mask!  Also, at the same time I found the magazine clipping of the "dream" sign.  The colors were perfect and did not overpower the rest of the painting."

I am absolutely thrilled with how this piece turned out and can't thank Ginny enough for taking it above and beyond where I would ever go with it.

Oh, and Ginny sent me her own half-done piece for me to work on, so I will be blogging about that in the future too.  Stay tuned!

Thanks, Ginny, what a fun project this was!

Cheers!
Joanna


ART JOURNAL FLIP THROUGH - PART 2

I'm still working out the kinks with this video production thing, so I appreciate you bearing with me.  I promise to get better!

Anyway, for those who are interested and all those who always ask for this, here is the link to my second art journal flip through video.

Thank you for looking!

Joanna


RECYCLE THOSE CHRISTMAS CARDS INTO ORNAMENTS !


Hello All and welcome back!

This is just a quick post to share the link to my guest artist post over on "12 Months In View," where we take Christmas cards and recycle them into angel ornaments.  For those of you with me back in December 2012, I posted this lesson here on my own blog.

Here is the link and I hope you enjoy this quick and easy project!

Cheers!
Joanna

Mixed Media Greeting Cards - Part 2


Following up to my post from last week (October 10, if you didn't catch it), here are a few more of my handmade greeting cards.

I hope you enjoy them!

Cheers!
Joanna


FREE VINTAGE THANKSGIVING IMAGES TO DOWNLOAD


Hello everyone!

I have a link up on my Facebook page with some free vintage Thanksgiving images for you.  Here it is:

Vintage Thanksgiving Images Download Link

Hope you'll enjoy making your wonderful creations with them.  Be sure to share photos of your projects when they are done.  I'd love to feature your work on this blog.

Cheers everyone and Happy (Canadian) Thanksgiving!   I am very thankful for all of you!

Joanna

Mixed Media Greeting Cards - Part 1


I've been making handmade greeting cards for about 20 years, the last 15 of which mostly focusing on mixed media.  I love making them and hope that the giving of a real card that you can hold in your hand has not become a lost art.  You wonder sometimes, with e-cards becoming so popular, as well as how easy it is to send a sentiment by Facebook, Twitter, or phone.

Anyway, I thought I'd share with you a few of my handmade cards.  I use all sorts of things to make them including:

  • prints of my own work;
  • vintage images;
  • reclaimed scrapbooking materials
  • old wallpaper, dictionary and book pages;
  • paint, markers, dyes and inks;
  • recycled office supplies;
  • dimensional paint and glitter;
  • maps, sheet music, etc;
  • stamped images

and almost anything else I lay my hands on.

Here are a few samples.  I'll post more next week.

Cheers, my friends!
Joanna


FREE HALLOWEEN IMAGES TO DOWNLOAD


If you haven't already gone to my Facebook page to download all those wonderful vintage Halloween images, here's the link:


Halloween Images Download Link


You can use these images for so many different artsy craftsy applications.  The sky's the limit!  Have fun with them and be sure to let me know what you create using them.  I'd love to feature your work on this blog.

Cheers!
Joanna

Featured Artist - Ginny Markley "Playing With Paint"

Handmade Art Journal By Ginny Markley

Artist Trading Cards By Ginny Markley


The absolute BEST thing about joining online art communities is the wonderful friendships you make with other artists from all over the world.  I can't even begin to express how important these people are to me and how much I value having them in my life.

Case in point, my dear friend Ginny Markley.  We have never met in person.  She lives in Florida and I live in Western Canada.  While it is my heartfelt wish that we do meet one day, even if we don't she has a special place in my heart.  A talented, generous soul, Ginny has a terrific blog you may want to check out.  She offers tutorials of how she creates her wonderful work.  Here is the link:

Ginny Markley's Blog

Ginny recently surprised me with one of her wonderful handmade art journals, along with some of her fabulous ATCs (see photos above).  If you are interested in how she created the journal, here is the link to that tutorial:

Paper Lunch Bag Art Journal Tutorial

And here is a link to her ATC work too:

Ginny's ATC Tutorial

It will be my absolute pleasure and honor to use this beautiful gift in which to create my art and I will think of my dear friend, Ginny, whenever I use it.

Cheers!
Joanna


Featuring Kay Strum - Greeting Card Artist Extraordinaire!

Some time ago I posted a couple of entries on this blog with links to my mixed media backgrounds, predominantly made with my beloved Gelli Arts gel printing plate.  I was so pleased with how they turned out I wanted to share them with all of you for you to use in your own art, as you wished.

Here's the link to those backgrounds if you missed them:

Blog Post With Free Backgrounds

Facebook Page With Free Backgrounds To Download


My friend, Kay Strum, is an artist at making the most beautiful greeting cards.  When I saw the results of what she had done using my backgrounds as a backdrop for her cards, I had to put a post up here for all of you to see her awesome work.

Thank you, Kay, for sharing your wonderful art for us all to enjoy!

XOXOX
Joanna

Original greeting card by Kay Strum

Original greeting card by Kay Strum

Original greeting card by Kay Strum

Original greeting card by Kay Strum

Original greeting card by Kay Strum

Add caption

Original greeting card by Kay Strum

Original greeting card by Kay Strum