Showing posts with label zentangle. Show all posts

ART JOURNAL FLIP THROUGH - PART 2

I'm still working out the kinks with this video production thing, so I appreciate you bearing with me.  I promise to get better!

Anyway, for those who are interested and all those who always ask for this, here is the link to my second art journal flip through video.

Thank you for looking!

Joanna


Art Journal - Video Flip Through 1

Happy New Year, my dear friends!  I hope you had a wonderful holiday season and that you are rarin' to go again in 2014 with lots of arty projects.

I have been lax in posting to my blog the last couple of months because of other commitments but I am back now and will do my best to share what I'm up to on a regular basis.  I so appreciate you checking in from time to time to see what I'm doing.

I decided to share my first ever video that I made a few months ago.  It's pretty rough but I decided I would share it anyway.  Part of being an artist is learning new things and working through the learning curve to improve your craft.  My video recording certainly needs some work but because I am asked so often to share more of what I do and how I do it, I figured even in this amateurish state, you might enjoy the video.

In this video I do a quick flip through of one of my art journals and talk a bit about the pages and how they came to be.  I can't tell you how many people have said, "Wow, I'd love to take a walk through your art journals one day."  Well, be careful what you wish for.  Ha, ha!

See you again soon, my dear friends!

Joanna


Newest Gelli Print Art


Hello all;

This is just a quick post to show you some of my recent work.  I've been playing with prints of my Gelli plate prints and enhancing them with doodles, flowers, etc.  I really like how these enhancements really make each print a whole new piece of art.

I've been using assorted markers and pens and some colored paper here and there.  Love how colorful and whimsical these have turned out and I hope you enjoy them too.

I liked how "Enjoy The Journey" turned out so much, that I have ordered a very small limited edition run of notebooks featuring this print on the cover.  I'll be listing a couple of them in my Etsy shop in due course.

Until next time, happy arting!

Joanna


Gelli Print & Zentangle Simple Art Journal Page - Part 5

Hello all!

In my ongoing "how to" series of simple journal pages, I thought I'd bring you a page that combines some techniques you might not have thought to put together or that if you had thought of it, you'd say, "naw, that won't work."  That was my reaction when I first considered this, but as it turns out, I was wrong.  Yet again.

Anyway, this page is done in my Strathmore Bristol Journal (5.5" X 8").

The first step was to glue into the journal one of my gazillion Gelli Plate printed papers to be the background.  This particular piece was done on heavy tissue paper and I used acrylic and fabric paint for the prints.  The fabric paint is the black doodly lines.  The rest of the color was done with acrylics.  Actually, this was one of my very first Gelli plate printed papers, now that I see it again.  Anyway, I waiting for the glue to dry and then just ripped the excess from around the sides without worrying about a finished look for the edges.


Next, I took another of my early trial pieces of Gelli plate printed paper and cut out some simple shapes from it.  I hadn't been too happy with this print so cutting it up made it more palatable for me.  I ended up with some semi-circular pieces that I glued on top of the background page.  Looking at the page at this point, the circles reminded me of planets or moons so I decided there should be a celestial theme to this page.


I still didn't like this page all that much.  It was too plain and didn't have enough interest or depth for me.  So, I started some zentangle inspired doodling.  I used the zentangle pattern Mooka on the planet/moon images and then doodled the Paisley pattern into the background.  Both were done with a permanent black marker.


So, now at least I like the page a bit more, but what do I do next?  The answer to that question eluded me for a couple of months until just recently.  I often use reprints of my original collage art from years gone by.  I like to find new way to use old work, thus getting more mileage out of the art I have already created.  Though the image may be a reprint from an original, it ends up becoming an all new original by being a component in a new piece.  As an artist who has minimal time to devote to art because I work full time, I really appreciate this twist on "recycling" art.  It really helps me make the best use of my precious art time and I enjoy the personal challenge of taking something old and giving it new life in a new way.

The next image shows a color laser print of a mixed media collage I did in about 2006 or so.  I printed it to be about 3" X 5" so that it would fit on the journal page as the central image.  I cut it out with deckle-edged scissors and then ran a black stamp pad around the edges for a grungier finish to it.  Then I glued it onto the page.


Now I'm starting to like the page a whole lot more!  Next, I used the same strategy from the last step and took a scan of a handmade star face piece I had created in the mid 1990s from molded Friendly Plastic.  I had already used this star in a large collage/assemblage in 2005 (I think) but I had had the foresight to scan the star before the piece sold.  It was originally about twice the size of the images of it you see here.  I took the scanned image and created several duplicates of it on a single page and printed them on the color laser printer.  Then I cut them out and mounted them to some shimmery silver paper and trimmed them out so that they would have a silver border that somewhat mimics the silver frame in the central image.  Then I glued them in place on the journal page, making sure that a couple of them ran off the edges of the page, trimming away the overhang.  Following is the finished page with the stars added.


I think this post is a good example of how to conquer a couple of challenges that many of us encounter.  First, we may only get so far on an art journal page and then get stalled out, not knowing what the next step should be.  I am never afraid of just leaving a piece of art partly done and coming back to it at a later time.  I've always been a firm believer that it will come together when it's supposed to.  And it always does.  And when it does, it happens very quickly, as this did.  Once I settled on the central image, the rest of it took only about fifteen minutes to finish.   I didn't worry or stress about the fact that it sat for a couple of months.  I have many other projects on the go at any given time.  I just know I will always come back to the unfinished ones at some point.

Secondly, don't be afraid to recycle art you've already made and use it again in a new way.  If you have limited time to devote to your art, this approach could be very liberating for you.  You'll get to see finished work sooner and have the wonderful sense of accomplishment from your limited creative time.  I think that is SO important to those of us who are starved for art time.  Working smarter and not feeling that you always have to reinvent the wheel every time you sit down to create can make the difference in feeling more satisfied with what little time you get for art.

I hope you've enjoyed this post, my friends.  Feel free to contact me if you have any questions.

Happy creating!
Joanna


Gelli Plate Prints, India Ink And Zentangles

What to do with all those Gelli plate printed papers???  Hmmm.  Well, I think this is a pretty unique way to use them and super simple too.

I took a piece of paper that I had monoprinted on with my Gelli plate.  I hadn't been too happy with how this   particular piece had turned out and tried to figure out what I could do to improve it so that I would actually use it in my art.  (Sorry, I didn't take a scan of the page without anything on it so I could show you each step.)

I took my India ink and with an eyedropper, started at one end of the long side of the paper (it's 8.5 X 11 copy paper) and drizzled the India ink liberally along the edge so it would run down the page in multiple streams of varying length.  Then I set it aside to dry.

When it was dry, I turned the paper around and did the same thing again from the other end of the long side, allowing the ink to link up with some of the drizzles from the previous step.  After it was dry, I touched up each of the ends to form a border of black ink and let it dry again.

Then I decided to do some journaling and zentangle inspired doodling in the spaces created by the drizzles of India ink.  I used my Uniball Vision gel pen (permanent) because it flows quite nicely over the paint on the page.  I alternated between journaling and doodling as I moved across the page, and I turned the page as I worked to make it more interesting to try and read the text.  (It reads "go with the flow" and "bend but never break.")  Here's what it looks like partly done.


And here is the finished page, which I think I will glue into a journal.  I am pretty happy with how it turned out and it was a great solution, I think, for a piece I wasn't very happy with to start.  Now, I can hardly see all the things I didn't like about the print.  I think I'll try this again!

Have a great day everyone!
Joanna


More Abandoned Art Magnets


Hello!  I can't believe it's April already!  Woo hoo, summer is on its way!

I'm really getting carried away with this Art Abandonment thing.  Although I have been abandoning art for several years now, I have really gotten into it lately since I have been involved with my online group.  This month, I will continue to abandon more of my art magnets in my own and other communities as I travel.

These are miniature prints of my original art and each one measures 2" X 3.5" (see quarter in the photo for scale).

As I mentioned in my January post to our Art Abandonment Group (Facebook), magnets are great for abandoned art because they are easy to adhere to different surfaces that you might not otherwise consider as a suitable location for your art.  I have abandoned magnets on door frames, utility boxes (those big ones in public places that house city electrical connections or water shutoffs, etc.), playground equipment, the doors in public restroom stalls (inside, of course).  I try to make it a challenge for myself to find really out-of-the-way places to abandon magnet art.  It is SO fun to think how long it might be before someone discovers it and if only to be a "fly on the wall" to see the wonder on their faces when they find it.

I STILL love art by stealth!!

Cheers!
Joanna


Happy St. Patrick's Day!

Top o' the mornin' to ye!  Here's some green art, current and past, which I hope you'll enjoy.

Mixed Media Art On Canvas


"Nature Goddess" Bookmark


"Art On The Brain" Bookmark


"Moonscape" Greeting Card


Art Journal Page


Art Journal Page


Mixed Media Art


Mixed Media Art


"How Old Would You Be If You Didn't Know How Old You Are?" Greeting Card

March Magnet Madness - Abandoned Art


For the month of March, I will continue to abandon more of my art magnets in my own and other communities.

These are miniature prints from my original art and each one measures 2" X 3.5" (see quarter in the photo for scale).

As I mentioned in my January post to our Art Abandonment Group (Facebook), magnets are great for abandoned art because they are easy to adhere to different surfaces that you might not otherwise consider as a suitable location for your art.  I have abandoned magnets on door frames, utility boxes (those big ones in public places that house city electrical connections or water shutoffs, etc.), playground equipment, the doors in public restroom stalls (inside, of course).  I try to make it a challenge for myself to find really out-of-the-way places to abandon magnet art.  It is SO fun to think how long it might be before someone discovers it and if only to be a "fly on the wall" to see the wonder on their faces when they find it.

I love art by stealth!!

Cheers!
Joanna


Zentangle-Inspired Original Magnet Art

I haven't shown much in recent months that features my doodling and zentangle-inspired art, even though I still doodle regularly.  I discovered zentangling almost three years ago and immediately became hooked on it.  I was, and still am, so grateful for discovering this new art form and being able to integrate it into my mixed media work.  Having worked in collage and mixed media for so many years, it was wonderful to be able to infuse my work with something new and interesting.  Any artist fears their work becoming stale and getting bored with doing the same old thing.  Adding doodling to my art, has given me (and the art) a boost and moved me in new directions.  That is always a good thing for an artist.

Here are two little original magnets I made recently.  I doodled them on my own handpainted papers and I really like how they turned out.  They are encased in acrylic magnetic holders which protect the art well.  They measure about 3.5" X 3.5" and will be available in my Etsy store here very soon.  $9.95US each.  If purchased here through my blog, I will pay the shipping anywhere in North America as my thanks for the support.

If you want to find out more about the art of zentangle, check out these websites:

Zentangle

Tangle Patterns


"The Only Gift ..." Original Art In My Etsy Shop


I often forget that I should be using this blog to promote what I am selling in my Etsy shop.  Duh!

So, here's a piece that is a combination of mixed media, collage and zentangle-inspired work.

The quote is, "The Only Gift Is A Portion Of Thyself."  Unfortunately I can't remember whose quote it is.


It is about 5" X 8" in dimension and was made using salvaged cardstock for the substrate, assorted recycled papers, inks, stamped images, zentangle doodling and various images.

The link to the listing on Etsy is here.

Thanks for looking!

Joanna

February's Art Abandonment Project

For the month of February, I will be abandoning more of my original, one-of-a-kind art magnets in my own and other communities.  I will be  travelling between Kelowna, BC, Calgary, Alberta and Puerto Vallarta, Mexico and plan to have these with me.

These are miniature pieces of original art and each one measures 2.5" X 3.5" (see quarter in the photo for scale).

As I mentioned in my January post to our Art Abandonment Group (Facebook), magnets are great for abandoned art because they are easy to adhere to different surfaces that you might not otherwise consider as a suitable location for your art.  I have abandoned magnets on door frames, utility boxes (those big ones in public places that house city electrical connections or water shutoffs, etc.), playground equipment, the doors in public restroom stalls (inside, of course).  I try to make it a challenge for myself to find really out-of-the-way places to abandon magnet art.  It is SO fun to think how long it might be before someone discovers it and if only to be a "fly on the wall" to see the wonder on their faces when they find it.

I love art by stealth!!

Cheers!
Joanna


Where Do You Get Your Quotes?

I have been using quotes for many, many years in my art and I am often asked where I get them from.  I started collecting quotes that really resonated with me a long time ago.  This was long before the advent of all of those websites there are today where you can find any kind of quote you desire.  I used to write them down longhand in a booklet or type up lists of them to save and use in my art.

I think that a great quote (or part of a song's lyrics) are a key ingredient in my art.  I can't imagine creating art without them.  I am particularly partial to using song lyrics because music is my very favourite art form.  Yes, music, not art, although art is a close second.  I could do without many things in my life, but not my music.  There is nothing more valuable to me and I think the greatest gift we can give one another is the gift of music.  It is the universal language.

Sometimes I will have a quote (or lyrics) rolling around in my head that I really want to use in a piece of art and that is the jumping off point when I start creating.  Other times, the art itself starts to come together long before I find a quote to go with it.  Sometimes the art will sit for months, mostly finished, just waiting for the right quote or lyrics to pop into my head.  I never try to force myself to match up a piece of art with the right quote.  I have complete faith that the right one will reveal itself to me at the right time.

When I was a teenager in the late 1970s, and had to do typing practice for school, I would type up song lyrics.  I kept a huge binder of them for years!  Needless to say, many of those lyrics are still rambling around in my brain.   Trust me, you want me on your music trivia team.

Because I no longer play music (as a musician) and focus on creating art instead, I try to meld these two loves as often as I can.   I love to do homage art featuring lyrics from my favourite musicians and bands as a small way to pay tribute to them for all the enjoyment their music has given me over the years.  If I had more time, perhaps when I retire from the workforce, I would like to do a whole series of art with music quotes. 

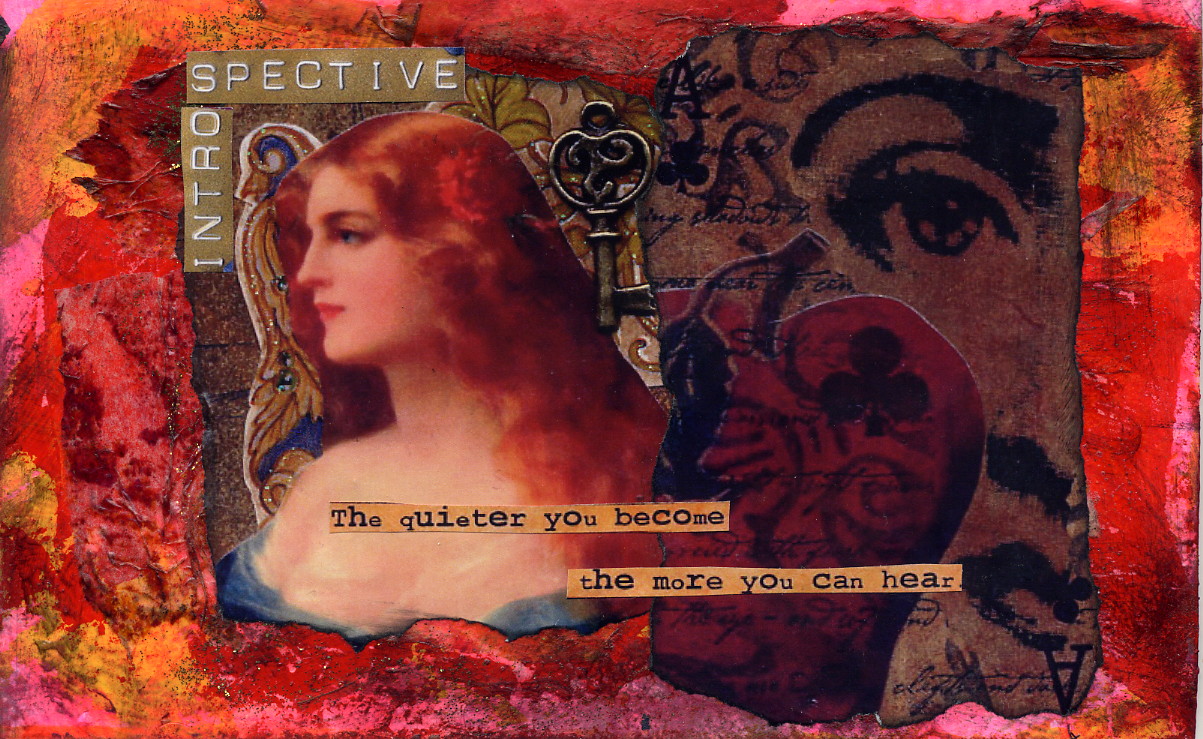
Anyway, here are a few pieces, some brand new and some quite old, that use some of my favourite quotes. I  hope you enjoy them.

Namaste, my friends
Joanna


Facing Your Fears - Art Journalling With Confidence

I admit it.  I am not comfortable drawing, painting or creating faces in any way, shape or form.  There I said it.  Now maybe I can get on with the business of practicing faces so I will be confident creating them.

This journal page uses a stencil from the fabulous Julie Fei-Fan Balzer of Balzer Designs.  She created several face stencils for those face-phobes like me who avoid 'em.  This was my first attempt at working with her stencils and I am pretty happy with the results.  The simple background was created with sprays (Adirondack Color Washes, as well as some home made recipes).  I used a pencil with the stencil and then a heavy Sharpie marker.  A finer marker did all the little words in her hairdo, as well as the drippy hearts (my favourite-est doodle).  Her eyelid, lips and earring are embellished with purple glitter.

This journal page is called, "She Is ..." and she is all the adjectives noted in her 'do.'


The Evolution of An Art Journal Page

"Turn Your Face To The Sun And The Shadows Fall Behind You" (the Maori).  The background for this journal page was done as a practice piece in Joanne Sharpe's "Color Love 101" class in the fall of 2012.  It sat for a long time like this:


Then I finally got around to doing some embellishing of it with a Sharpie marker and a white Gelly Roll pen and it looked like this:


And now, many months later, I have finally finished it once and for all!  I turned it on its side and decided on the quote I wanted to use, which is one of my very favourites.  The face images are color photocopies of handmade face cabochons I molded in metallic silver Fimo years ago and had used in an ATC/ACEO card several years back.   I am very pleased with the overall end result and am thinking of entering this journal page in a competition.


Handmade Art Journal - Part 2

Following up to my post from January 1, here are the remaining six pages of my handmade art journal.  I hope you enjoy viewing them as much as I enjoyed creating them!

Namaste, my friends.
Joanna

Page 13 - "Have A Heart" (left page of two page spread)


Page 14 - "Be Happy" is the right page of a two page spread with "Have A Heart" above.


Page 1 5 - "Show Grace" (left page of two-page spread)


Page 16 - (right page of two-page spread with "Show Grace" above)


Page 17 - "Keep It Simple" (left page of two-page spread)


"Page 18 - "Believe" (right page of two-page spread with "Keep It Simple" above)