

Here's a really simple collage/mixed media art piece that will demonstrate for you beginners out there how very easy it is to create a beautiful collage with minimal materials and minimal cost. There is absolutely NOTHING new used in this piece of art!
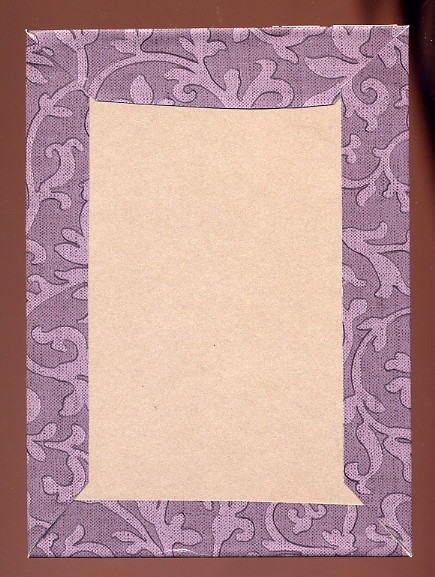
I started with a piece of heavy chipboard that was part of the packaging of some appliance. It is a nice, sturdy piece and measures about 5" X 7" so the minute I saw it I knew it would make a good base for a small collage.
I covered it in a piece of scrap wallpaper. If you don't already know this, wallpaper is an excellent material for collage and mixed media art. It is very strong and can be used for a number of artsy applications. I often use it for backgrounds for my art. And it's free! You can go to your paint store and get the sample wallpaper books for free. They usually throw them out. Don't pay for the books, just go somewhere else if they want to charge you for them. You'll have a great collection of all kinds of printed backgrounds to use in many, many ways.
To cover the chipboard with the wallpaper, I cut the paper larger than the chipboard allowing about an inch extra all the way around. I will usually use white glue (Aleene's is my favourite), spread evenly on the chipboard and wrap the wallpaper around the chipboard, mitering the corners of the paper for a nicely finished edge. Burnishing or running a brayer over the front side, helps to ensure a smooth surface to work on later. Turning the piece over, I used more white glue to adhere the excess paper around the edges to the back of the piece. (See photo below of the back of the piece.)
When it's all dry, I am ready to start my collage on the front. I had found a wonderful Buddha image in a discarded National Geographic magazine and knew I wanted it to the be the focal image in a collage. Because of how it was shaped (see photo), I aligned it to the lower right. I will typically work with images this way. Whichever way they come to me, I work with that. If they must be left aligned to look correct in the context of the collage, then that is how they get placed on the background. If the bottom of the image is missing for some reason, then it will probably get aligned to the bottom of the page. I never "fight" how the image is, I just work with it. In this case, the image was a 90-degree angle (bottom and right aligned) so that determined where it would be placed.
With Buddha aligned to the bottom right, the logical place for the next image was the upper left, for balance and symmetry in the piece. Given that this was now going to have to be a Zen themed piece, I tried to keep in mind one of the main principles of Zen and that is simplicity. I knew I was not going to add a whole lot of elements to this piece so whatever elements DID make it into it, they had to have enough presence to hold their own. I used the stamped image of the sun/moon face on Gelli plate printed paper and it was a nice complement to the Buddha. I deliberately chose the bright pink paper for the face so that it would juxtapose with the muted purply tones of the Buddha image, yet still work together overall because the colors are complementary to one another (and to the background as well).
At this point, I knew that there wasn't too much else to be added to the piece for it to be done. When you are at this stage in developing a piece, it's good to step back and look at it with a critical eye. Where are the blank spaces that cry out to be filled? What more needs to be done? What areas need to be left alone? Play around with placement of your elements until it feels right.
The bamboo bits are stamped images on scrap paper, again kept to a minimum and the text was cut from a photocopy of one of my previous collage pieces from years ago. I will often recycle text or quotes over the years. There is no reason on earth to have to reinvent the wheel every time you set out to make some art. In this case, I knew the quote would be perfect so why not use it again.
And that is the whole piece. A couple of coats of matte sealant and it is ready to go. I will cover the back with another piece of recycled wallpaper so that it has a finished look. That way, it won't matter if this piece is framed or if it is displayed on a small easel. Either way it will look great!

I hope this lesson has shown you that you can get some great effects with a minimal amount of work and with low-to-no cost supplies. Start looking around and see what you can make art with. I'll bet you'll be surprised at how much you CAN do!
Have fun in your artsy adventures, my friends.
Joanna
5 comments:
Thank you Joanna for this great tutorial. This is a lovely piece. You have given me so much to think about regarding recycling. I also appreciate the explanation of why you place items the way you do. This is so very, very helpful. Thank you :)
My pleasure, Erin, I'm always glad when I can share a technique with others. Especially if it gets someone over a stumbling block or enthused enough to get started on an arty project. Cheers! Joanna
Thank you for sharing your collage techniques. I basically create in the same fashion. Sometimes I just grab what's on my desktop and go from there. It is always fun to move things around and around until it looks balanced. PS...I love your gelli prints!
Huge thankyou to you Joanna for giving your time to show some collage techniques. Hugs xxxx
Thanks so much, Wendy and Wendy. Glad you enjoyed this little post! Cheers! Joanna
Post a Comment